
The Trick to Seating Your Invisalign Tray on Stubborn Molars
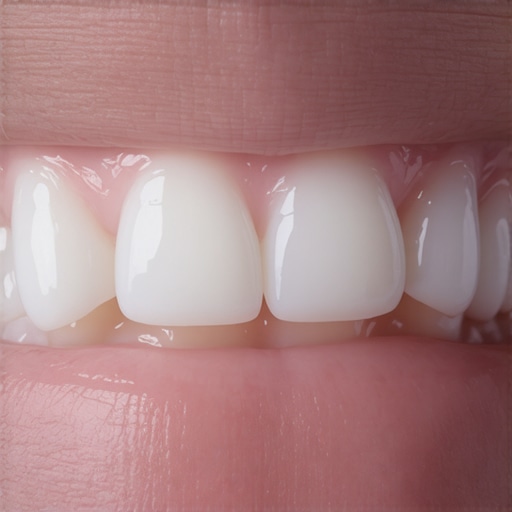
It was late at night, and I was staring in the mirror, frustration bubbling up as my Invisalign tray refused to seat properly on that stubborn molar. No matter how much I pressed or twisted, it just wouldn’t click into place. That lightbulb moment hit me hard: these persistent molar seating issues are more common than we think, and I knew I wasn’t alone in this struggle. If you’re tired of battling with uncomfortable trays or worried you’re not doing it right, don’t worry—I’ve been there too, and there’s a way to make it smoother.
The Secret Trick I Wish I Knew Sooner
Dealing with Invisalign trays on complex molars can feel like trying to fit a puzzle piece that’s just a hair too big. But over the years, I’ve discovered a surprisingly simple technique that transformed my experience—and it’s not about brute force or complicated tools. Instead, it’s about understanding the anatomy of your teeth and applying a gentle, strategic approach to seating the trays correctly.
Many people underestimate how crucial proper tray placement is for effective Invisalign treatment. An improperly seated tray can delay your progress, increase discomfort, or even cause misalignment. That’s why mastering this trick is worth every bit of your effort. Ready to learn the method that turned my frustrating nights into confident, painless adjustments? Let’s dive into it.
Ever Worried That Your Invisalign Isn’t Working Because of Seating Issues?
Early on, I made a mistake that many novices do: I tried to force my tray into place without considering the subtle anatomy of my molars. This not only caused unnecessary discomfort but also risked damaging the tray. Remember, even the smallest misalignment can set back your treatment. The key is patience and precision, not brute strength. If you’re curious about the importance of proper treatment techniques, you might find it helpful to explore how Invisalign transforms family dentistry [here](https://familydentistpro.com/how-invisalign-transforms-family-dentistry-in-2025).
Now that we’ve identified the common problem—stubborn molars refusing to seat—let’s explore the practical steps to fix this once and for all, ensuring your Invisalign journey stays on track.
Ensure Your Teeth Are Prepared Before Seating
Start by thoroughly cleaning your mouth and teeth, especially around the problematic molar area. Use a soft toothbrush or interproximal brush to remove any debris that might hinder proper tray placement. This step is crucial because residual plaque or food can prevent the tray from seating correctly, similar to trying to fit a piece of furniture with crumbs underneath.
Identify the High-Spot Areas
Gently run your fingertip or a clean tool over your molars to detect any unevenness or high points. These are spots where the tray might be resisting seating. Recognizing these areas helps you target your adjustments precisely, akin to a tailor customizing a suit for perfect fit.
Use a Gentle Tapping Technique
Position the tray over your teeth, aligning it carefully. Instead of forcing it down, lightly tap along the edges with your fingers or a soft object like a cotton swab. This micro-motion encourages the tray to settle into all grooves without applying excessive pressure, reducing discomfort and avoiding damage. I once used a clean wooden toothpick to gently tap the tray on my molar, which helped it seat fully without pain.
Apply Controlled Pressure with Your Fingers
Place your thumbs on the tray and press downward with steady, gentle force. Think of this like pressing a stamp onto paper—firm but controlled. Focus on pushing the tray around the stubborn molar area, not blindly pressing everywhere. This method ensures the tray molds snugly around all tooth surfaces, improving fit and treatment efficacy.
Utilize Your Tongue as a Natural Aid
Gently press your tongue against the inside of your teeth near the tray. This pressure can help push the tray into place from within, particularly useful if the external adjustments are insufficient. Remember, your tongue is like a natural tool—use it wisely to guide the tray into alignment, similar to how a sculptor nudges clay into shape.
Reassess and Adjust in Small Steps
After initial seating, pause to check for any discomfort or areas where the tray doesn’t feel snug. If needed, repeat the gentle tapping and pressing steps. Patience is key—rushing can cause irritation or misfit. Over time, repeated gentle adjustments train your mouth to accept the tray comfortably, much like breaking in a new pair of shoes gradually.
Don’t Overforce; Know When to Seek Help
If, despite careful adjustments, the tray refuses to seat properly or causes pain, stop immediately. For persistent issues, consult your dentist or orthodontist. They might suggest modifications, such as reshaping the tray or applying a safe, dental-approved lubricant. This proactive step ensures your treatment stays effective without unnecessary discomfort, akin to consulting a mechanic when a car won’t start despite your efforts. Remember, proper tray fitting is vital—not just for comfort but for the success of your Invisalign journey. If you’d like to deepen your understanding of modern dental practices, check out how Invisalign transforms family dentistry [here](https://familydentistpro.com/how-invisalign-transforms-family-dentistry-in-2025).While many people brush off misconceptions about family dentistry, Invisalign, oral health, and crowns, there are nuanced errors even seasoned patients tend to make. One frequently overlooked mistake is assuming that all dental restorations are alike or that cosmetic procedures don’t require ongoing maintenance. For example, many believe that crowns are permanent and never need renewal, but in reality, even high-quality crowns can develop microcracks or decay beneath if not monitored properly.
Another misconception revolves around Invisalign treatment. Despite its popularity, some think it’s suitable for every dental misalignment, but complex cases may require traditional braces or even surgical intervention. Invisalign’s success heavily depends on precise planning and patient compliance, which only experienced orthodontists can optimize. Want to learn more about the latest advancements in Invisalign? Check out how Invisalign transforms family dentistry [here](https://familydentistpro.com/how-invisalign-transforms-family-dentistry-in-2025).
What Do Most People Get Wrong About Maintaining Oral Health After Restorations?
Many patients underestimate the importance of tailored oral hygiene routines following crown placements or orthodontic treatments. Using generic brushing or flossing methods can lead to improper cleaning around restorations, increasing the risk of secondary decay or gum disease. For instance, interdental brushes can be more effective than traditional floss for cleaning around crowns or braces if used correctly. Overlooking this nuance often results in costly repairs or replacements down the line.
Furthermore, a common mistake is neglecting regular dental check-ups. Routine exams can detect early signs of issues like porcelain fracture, cement degradation, or periodontal problems that might not be visible or painful initially. Skipping these appointments can cause small problems to escalate into complex and expensive fixes, such as needing to replace a crown prematurely or undergoing extensive periodontal therapy. For comprehensive tips on maintaining your dental work, visit our guide on [top oral health practices](https://familydentistpro.com/top-oral-health-tips-for-your-familys-bright-smiles).
Exaggerating the durability of certain procedures or ignoring the significance of proper maintenance can undermine your overall dental health. It’s essential to understand that restorative treatments and orthodontics are part of a holistic, ongoing process. An error many make is assuming that a single procedure solves everything, forgetting that consistent care, lifestyle choices, and professional monitoring play critical roles. Have you ever fallen into this trap? Let me know in the comments.
Maintaining optimal oral health over the long term requires more than just regular brushing and flossing; it demands the right tools and consistent routines. Personally, I’ve found that investing in quality equipment and adopting strategic methods can significantly extend the lifespan of restorations like crowns and ensure the effectiveness of treatments such as Invisalign and family dentistry practices.
Prioritize Your Toothbrush: Electric vs. Manual
Choosing the right toothbrush is foundational. I personally use the Philips Sonicare DiamondClean because of its sonic technology, which creates high-frequency brush movements that disrupt plaque more effectively than manual brushing, especially around crowns and orthodontic appliances. For patients with limited mobility or braces, an electric toothbrush simplifies maintaining good hygiene and prevents plaque buildup that could compromise restorations.
The Power of Proper Flossing Tools
Flossing is vital, but traditional floss can be tricky around crowns or braces. That’s why I recommend the Waterpik Ultra Water Flosser. Its pulsating water stream reaches places that floss might miss, cleaning around crowns and beneath orthodontic wires with less effort. Personally, I use mine daily, especially after meals rich in sugars or carbs, to prevent secondary decay or gum issues near dental work.
Employing Advanced Plaque Disclosers
To truly understand where plaque might hide, I suggest periodic use of plaque disclosing tablets like Plaque HD. They temporarily stain plaque, highlighting areas that need extra attention. I occasionally incorporate them into my routine to identify spots I might have overlooked, ensuring comprehensive cleaning around crowns, veneers, or Invisalign attachments. This approach aligns with the best practices outlined in recent dental literature, emphasizing targeted cleaning to enhance treatment longevity.
Invest in Sealants and Protective Coatings
For ongoing protection, especially in susceptible areas, consider applying dental sealants or fluoride varnishes. Regular professional application can be complemented with at-home products like Prevident 5000 Plus, which I use nightly. They strengthen enamel and reduce the risk of decay beneath crowns or around orthodontic appliances, as supported by clinical studies in the Journal of the American Dental Association.
Harness Technology with Digital Monitoring
Emerging tools like smart toothbrush apps (e.g., Philips Sonicare App or Colgate’s MySmileByMe) provide real-time feedback on brushing pressure and coverage. Using these apps, I can fine-tune my technique, ensuring thorough cleaning without damaging delicate restorations. In the future, I predict that AI-powered dental monitoring devices will further personalize and optimize home care routines, drastically reducing treatment failures and re-treatments.
How do I maintain my tools over time? It’s simple: regular replacement and proper cleaning are key. Replace brush heads every three months, as recommended by manufacturers, and clean all tools with warm water and gentle soap after each use. Proper storage, away from dust, helps maintain hygiene and equipment efficacy. This routine ensures your tools continue to perform at their best, preserving your investment in health.
One of the most effective advanced tips I’ve integrated into my routine is using plaque disclosing tablets weekly. They’re inexpensive, easy, and reveal hidden plaque that standard brushing might overlook. If you want to experience a noticeable improvement in your oral hygiene, I urge you to try this tip. It’s a small step with significant benefits and aligns perfectly with the latest developments in preventive dentistry, such as the strategies highlighted in the American Dental Association’s technical resources on maintaining restorative work [here](https://jada.ada.org/article/S0002-8177(22)00658-3/fulltext). Incorporating this practice has truly helped me keep my dental work in top shape and ensure my smile lasts for years to come.
What I Wish I Knew About Family Dentistry and Invisalign Sooner
One of the most unexpected lessons was realizing that patience and gentle technique trump brute force every time. The minute I stopped rushing and started listening to my mouth’s subtle cues, my trays seated perfectly with much less discomfort. I also learned that understanding my own dental anatomy is key—every smile is unique, and customizing my approach made a world of difference. Lastly, I discovered that ongoing education and trusted resources empower you to take charge of your oral health, transforming a daunting journey into an empowering experience. This insight revolutionized how I approach my dental care and could do the same for you.
Tools That Changed My Game for Better Oral Health
Investing in quality tools has been a game-changer. I swear by my Philips Sonicare DiamondClean for effective and gentle cleaning, especially around crowns and braces. For flossing, the Waterpik Ultra Water Flosser ensures no plaque hides in tricky spots. Incorporating plaque disclosers like Plaque HD helped me pinpoint missed areas, elevating my daily routine. Additionally, routine use of fluoride varnishes like Prevident 5000 Plus has fortified my enamel. Emerging tech, such as smart toothbrush apps, personalizes my brushing and keeps me motivated. Trust me, these tools are worth the investment for safeguarding your smile long-term.
Empower Your Smile and Embrace Your Dental Journey
Your smile tells your story—don’t let stubborn trays or misconceptions hold you back. Small adjustments, informed choices, and a proactive attitude can make your dental experience smoother and more rewarding. Remember, the journey to a healthier smile is ongoing, and every step you take today sets the foundation for a brighter, more confident tomorrow. Dive into continuous learning, stay curious, and celebrate each milestone along the way. Your dental health is worth it, and you have the power to shape your future smile—start now!