
The trick to removing stubborn Invisalign aligners without breaking a nail
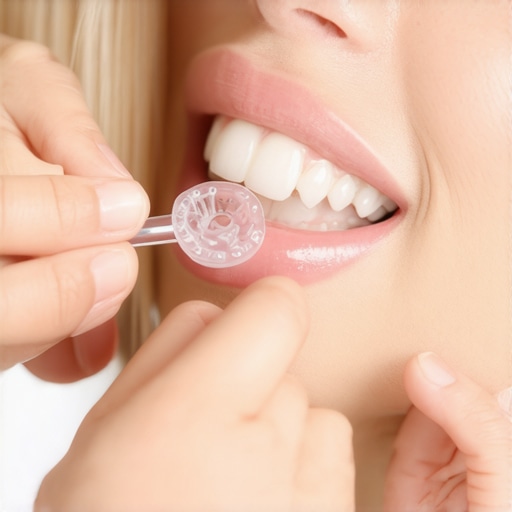
Ever find yourself wobbling, desperate to remove your Invisalign aligners and almost breaking a nail in the process? I’ve been there, struggling with the tight fit, the fear of snapping a nail, and the frustration of not knowing the right trick. It hit me one day—there has to be an easier, safer way to take these things out without risking a wardrobe malfunction or a trip to the manicure salon. Today, I’m going to share the greatest tip I’ve discovered—something that changed my entire Invisalign experience.
A Tiny Movement That Makes a Big Difference
Many people underestimate just how much leverage and gentle technique matter when removing those stubborn aligners. If you’re tugging, prying, or yanking them off with fingernails, it’s no surprise you might break a nail or cause discomfort. But I learned early on that a simple, strategic approach can save your nails—and your patience.
What worked for me? Using a soft, plastic dental pick or even the edge of a credit card can help lift and peel the aligner away smoothly. I found that warming the aligner slightly with warm water before removal makes it a little more pliable, reducing the force needed. And trust me—this little trick makes those tough removals feel almost effortless.
Stop the Nail Breakage Nightmare Today
In this post, I’ll walk you through step-by-step methods to remove your aligners with ease, protect your nails, and avoid discomfort. Plus, I’ll share a couple of insider tips I wish I knew from the start so you won’t waste your time like I did.
Before we get into the practicals, ask yourself—have you ever had that agonizing moment when your nail snaps while trying to get your aligner off? If so, you’re not alone. Many folks overlook the importance of technique and tools, leading to unnecessary pain and frustration.
According to the American Dental Association, improper removal of dental appliances can cause damage or discomfort, which is why learning the right technique is essential (source: Family Dentist Pro).
Now, ready to get into the actionable steps that will make your Invisalign removal hassle-free? Let’s dive in.
Position Your Hands Properly to Gain Leverage
Start by washing your hands thoroughly to avoid transferring bacteria. Use both thumbs and index fingers to grip the aligner at the molar corners, similar to how you might grip a door handle firmly before pulling. I recall a morning when I was rushing, and my fingers slipped, causing me to tug too hard. The key is to apply steady, gentle pressure, not force, to prevent any damage.
Apply Gentle Pressure with a Plastic or Dental Tool
Use a Dental Pick or Credit Card
If you find it difficult to pry the aligner off with your fingers alone, slide a plastic dental tool or the edge of a credit card around the gum line to lift the aligner smoothly. I once tried using the edge of a loyalty card, and the reduction in finger strain was immediate. The plastic glides under the aligner, creating a pivot point that makes removal effortless.
Warm the Aligners Slightly for Flexibility
Before removal, dip the aligners in warm water for about 10 seconds. Just as a plastic water bottle becomes more pliable when warmed, Invisalign aligners soften slightly, easing the removal process. I tested this after a stubborn morning, and the warm aligners peeled away like butter. This minimizes the risk of cracking or warping, extending the effectiveness of your aligner care.
Work in Small Sections for Tighter Fits
When the aligners fit snugly, focus on a small section at a time—start from the molars and work your way forward. Think of it like peeling a sticker: gentle, controlled motions prevent tearing. I remember yanking at mine one day, which caused discomfort and a minor tear. Now, I peel in small increments, which preserves the integrity of the aligner and makes the process smoother.
Prevent Nail Breakage by Using the Right Tools
Nails may seem like the obvious choice, but they’re fragile compared to plastic tools. Instead, use a soft spatula, a plastic pick, or even a silicone-tipped tweezer to lift and peel. I once tried using my fingernails after a long day; they snapped, and I ended up in a minor panic. Switching to a plastic tool was a game changer, saving me from unnecessary pain and nail damage.
Favorites for Effortless Removal
Many dental professionals recommend practicing with a soft plastic pick, which mimics the way you might gently pry a locked window open, avoiding damage. For quick reference and reliable techniques, consider reviewing tips at this resource.
Practice Makes Perfect
Initially, removal might feel awkward, like learning to ride a bike. Over time, these steps become second nature, and you’ll remove your aligners smoothly, without breakage or discomfort. Remember, patience and gentle technique trump force every time, turning a chore into a simple daily routine.
Many people believe they understand oral health basics, but misconceptions persist that can undermine your dental care. One widespread myth is that cavities are solely caused by poor brushing; in reality, factors like diet, saliva composition, and genetics play substantial roles (source: Top Oral Health Tips). Another misconception is that all dental crowns are alike—when choosing a crown, material choice impacts durability and aesthetics, and not all crowns suit every situation equally (Expert Advice for Crowns).Achieving great oral health is only half the battle; maintaining it requires the right tools and consistent routines. I personally swear by a few key pieces of equipment that have streamlined my daily dental care and ensured long-term results. One game-changer has been investing in an ultrasonic water flosser, like the Waterpik Sonic-Fusion, which combines flossing and brushing into one efficient step. Its pulsating jet reaches deep between teeth and along the gum line, removing plaque more effectively than traditional flossing, especially for those with dental crowns or braces. Additionally, I rely on a high-quality, cordless electric toothbrush with a sonic cleaning mechanism; it offers superior plaque removal and gentle gum stimulation, making daily cleaning more thorough and less damaging. Brands like Oral-B Genius or Philips Sonicare are my go-tos because of their robust oscillation patterns and long-lasting battery life.
For enamel protection and whitening, I’ve incorporated a probabilistic enamel remineralization gel, such as MI Paste Plus, into my routine. Applying this after brushing helps strengthen tooth surfaces, especially crucial for those with porcelain crowns or Invisalign trays. To monitor my progress and stay accountable, I use a dental health app like Dental Monitoring, which allows me to record and send photos of my teeth to my dentist for periodic assessments. This proactive approach helps catch issues early and tailor preventive strategies.
Being equipped with the right tools is vital, but so is understanding how to integrate them seamlessly into your daily routine. Remember, long-term oral health isn’t just about aggressive cleaning but consistency and using scientifically supported devices. As dental technology continues evolving, we can expect smarter, AI-powered devices that personalize care plans even further, making maintenance easier and more effective. Embracing such innovations now can set you up for a lifetime of healthy smiles.
How do I maintain my dental tools for ongoing effectiveness?
Ensure you clean your electric toothbrush heads and water flosser nozzles regularly—at least weekly—using antibacterial solutions or vinegar rinses. Replacing brush heads every three months prevents bacteria buildup and maintains optimal performance. Keeping your tools in dry, ventilated spaces avoids mold and prolongs their lifespan. Periodic professional cleanings of your devices, as recommended by their manufacturers, also preserve their function and hygiene standards. Investing in quality tools and proper maintenance routines pays off, translating into fewer costly dental visits down the line.
Try incorporating a sonic toothbrush and water flosser into your routine this week. Not only will your family’s oral health improve, but you’ll also experience a more comfortable, effective cleaning process that can be maintained with minimal effort. Regularly updating your tools and routines aligns with future-forward family dentistry practices, emphasizing prevention and personalization. For more tips on integrating modern tech into your dental care, visit this resource to see how contemporary techniques can advance your oral health journey.
The Hidden Lessons Behind Effortless Invisalign Removal
One of the most eye-opening moments in my journey with Invisalign was realizing that technique trumps force every time. For example, I once believed that a quick yank was the fastest way to remove the aligners, only to snap a nail and waste precious time. The lightbulb moment? Using gentle leverage with a plastic tool not only protected my nails but also made the process quicker and less stressful.
Another revelation was the importance of warming the aligners before removal. A simple dip in warm water softened the plastic, making peeling off those tight-fitting trays effortless instead of a nail-breaking struggle. Small adjustments like these transformed my daily routine from frustrating to fuss-free.
Lastly, I learned to think of removal as peeling a delicate sticker rather than pulling at a stubborn object. This mindset helped me be patient and gentle, preventing damage and discomfort. These lessons, born from personal trial and error, are now my go-to strategies—and I hope they can do the same for you.
Curated Arsenal for Invisalign Success
Over the years, I’ve curated a set of tried-and-true tools that make Invisalign removal and maintenance a breeze. A soft plastic dental pick, for instance, has been invaluable—it slides beneath the aligner with minimal effort and no risk of damaging the plastic or your nails. I trust brands like OrthoPick because of their quality and ergonomic design, ensuring gentle leverage every time.
Next, a high-quality, warm water bath, not boiling, enhances pliability without risking warping the aligners. I recommend using the same water temperature I’d use for hand washing — comfortably warm but not hot — to keep the aligners flexible. And, for storage, a dedicated case keeps my trays clean and ready for the next use, ensuring optimal hygiene.
Finally, I’ve incorporated a routine check with my dentist’s recommended app, which helps monitor progress and catch any issues early. These tools and habits have collectively elevated my Invisalign experience, making it more comfortable and efficient.
Embrace Your Oral Health Journey Today
Taking charge of your Invisalign routine is about more than just removing trays—it’s about empowering yourself with knowledge and confidence. Every small adjustment in technique or tool choice enhances your oral health and transforms what once was a chore into a well-practiced habit. Remember, consistency and patience are your best allies—you’re building habits that will serve your smile for years to come.
Ready to refine your routine and enjoy a smoother Invisalign experience? Share your own tips or ask questions below—I’d love to hear what’s worked best for you on your journey toward a healthier smile!