
How to safely remove a piece of floss stuck between your teeth
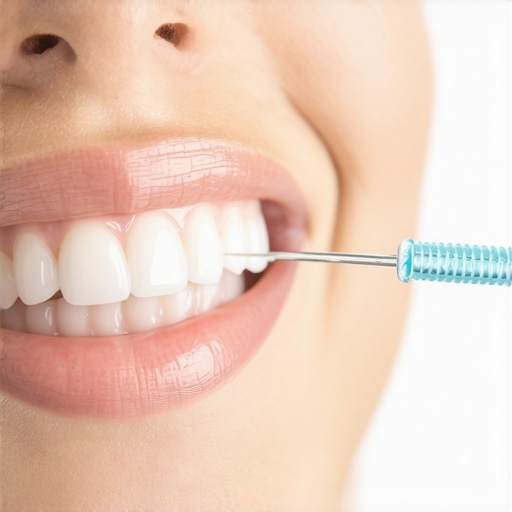
Ever had that sinking feeling when you realize a stubborn piece of floss is caught deep between your teeth, and no matter how much you wiggle or tug, it refuses to budge? I remember the exact moment—trying to get that last bit out after a long day, only to end up with more frustration and a sore gum. That lightbulb moment hit me: I needed to know the safe way to remove it without causing damage or pain.
In this post, I’ll walk you through practical, tried-and-true techniques to tackle this common dental dilemma safely and effectively. You don’t have to panic or resort to dangerous tools—there are gentle methods that protect your gums and teeth.
Why You Should Care About Floss Snags and Handling Them Properly
When a piece of floss gets stuck, it’s often a sign that your oral hygiene routine is doing its job—but it also can feel like a mini emergency. If mishandled, attempting to yank or pry the floss out can cause bleeding, gum injury, or even loosen a crown or filling. Early mistakes, like using too much force or sharp objects, can lead to costly repairs or infections. I used to think I could just pull harder, but I learned the hard way—gentle and deliberate movements are the key.
According to the American Dental Association, improper removal of floss can damage your gum tissue and lead to increased sensitivity or more serious issues. So, it’s important to understand the right technique.
Have you ever experienced that frustrating snag, and wondered if you’re doing it right? Don’t worry—you’re not alone. Many people face this issue and aren’t sure how to proceed without risking further harm.
Today, we’ll cover effective methods that respect your oral health. These techniques will help you remove stuck floss safely, avoiding unnecessary pain or damage. Ready to master the skill of gentle floss removal? Let’s dive into the steps.
Is Forcing It Actually Worth the Risk?
One common mistake I made early on was trying to force the floss out, thinking that persistence would do the trick. But I quickly learned that patience is more effective—plus, it keeps your gums intact. Using excessive force can lead to bleeding or even pulling a crown loose. Trust me, gentle is the way to go. For more insights on maintaining your dental restorations, check out [why crowns are a game-changer in restorative dentistry](https://familydentistpro.com/why-crowns-are-a-game-changer-in-restorative-dentistry).
By understanding the right approach, you can keep your smile healthy and avoid unnecessary trips to the dentist. Now, let’s look at some practical steps to remove that pesky floss safely.
Grab the Right Tools and Prepare
Before attempting to remove the snagged floss, wash your hands thoroughly to prevent introducing bacteria into your mouth. Find a pair of clean, fine-tipped tweezers or dental floss picks, which give you better control and reduce the risk of injury. Have a mirror nearby with good lighting so you can see exactly what you’re doing.
Identify the Exact Location of the Snag
Use your mirror to locate where the floss is caught. Determine if it’s lodged between teeth, around a crown, or near a dental implant. This clarity helps guide your approach and prevents unnecessary probing, which could damage sensitive tissues or restorations.
Use Gentle Movements to Free the Floss
Steady, Controlled Tugging
Hold the floss firmly near the caught point with your thumb and forefinger, and gently wiggle it back and forth. Think of it like trying to slide a stubborn zipper—gentle, deliberate movements work better than brute force. Apply consistent, light pressure, avoiding quick jerks that can tear gum tissue.
Employ Tweezers for Fine Adjustments
If the floss refuses to budge, gently grip the snag with fine-tipped tweezers. Carefully pull or wiggle the floss out, always moving in small, controlled steps. Remember—patience prevents injury. I once spent five minutes slowly wiggling out a piece of floss lodged near my molar, and the cautious approach saved me from gum bleeding.
Use Dental Floss Picks or Water Flossers if Needed
If the floss is still stubborn, light water flossers can help dislodge it by applying gentle bursts of water pressure. These tools are designed to remove debris without harming gums or restorations. Do not use toothpicks or sharp objects—they pose a high risk of injury or dislodging crowns, which can lead to costly repairs. For more on maintaining restorations, visit why crowns are a game-changer in restorative dentistry.
When to Seek Professional Help
If you cannot remove the floss safely or if bleeding persists after attempting removal, do not force it. Contact your dentist promptly through this link. Dentists have specialized tools to remove debris gently, ensuring your gums and restorations stay intact. Remember, forcing a stuck floss can cause gum recession or damage existing dental work, leading to expensive repairs. Check out hidden benefits of Invisalign and how modern tools improve oral health outcomes.Many patients assume they fully understand Invisalign, crowns, and general oral health, but there are often overlooked nuances that only dental professionals grasp. These subtleties can influence treatment outcomes and long-term oral wellness. For instance, while many believe that Invisalign is suitable for everyone, in reality, certain bite issues and jaw alignments may not respond well to clear aligners, making traditional braces or other orthodontic options more effective. It’s a common myth that Invisalign accelerates tooth movement significantly; however, the treatment duration heavily depends on case complexity and patient compliance. According to a study published in the American Journal of Orthodontics & Dentofacial Orthopedics, proper case selection is crucial—misjudging this can lead to prolonged treatment or unsatisfactory results.
What advanced considerations should patients discuss with their dentist before opting for crowns or Invisalign?
Many overlook the importance of assessing the underlying structural integrity of teeth before placing crowns or starting orthodontic treatments. For example, a decayed or weakened tooth might require root canal therapy before crown placement to prevent future fractures. Additionally, bone density and gum health play vital roles in treatment success but are rarely discussed in simple consultations. Modern imaging techniques, like 3D CBCT scans, allow for more precise diagnoses, significantly reducing the risk of complications. Failing to consider these factors can lead to issues like crown failure or insufficient realignment, requiring retreatments. If you’re curious about how to make the most of your dental investments, explore why crowns are a game-changer and consider comprehensive diagnostics. Disbelieving the hype and understanding these nuances enables you to advocate effectively for your oral health. Remember, excellent outcomes stem from informed decisions—so ask your dentist about these hidden details during your next visit. Also, consider how newer techniques, such as digital smile design, can tailor treatments even further, ensuring your smile’s longevity and aesthetic appeal. Feeling enlightened? Have you ever fallen into this trap of oversimplified dental advice? Let me know in the comments.Maintaining your dental work and oral health requires more than just daily brushing and flossing; it demands the right set of tools and consistent routines. As a family dentist, I’ve seen firsthand how investing in quality equipment can make all the difference in long-term results. One device I personally recommend is the Sonicare ProtectiveClean electric toothbrush. Its sonic technology delivers superior plaque removal and gum stimulation without causing abrasion, which is essential for wear-resistant restorations like crowns and veneers. Using a brush with a pressure sensor helps prevent overbrushing, which can damage delicate tissues or dislodge dental work. For at-home whitening, I trust the AuraGlow LED Mouthpiece because it provides consistent, even light activation, helping maintain your smile’s brightness without the frequent visits to the office. When it comes to interdental cleaning, Waterpik water flossers are game-changers—gentle yet effective, especially for those with braces, implants, or crowns. The water pressure can dislodge debris in hard-to-reach areas better than traditional floss, reducing the risk of decay or gum disease. I personally incorporate the Waterpik Ultra model into my routine because of its adjustable pressure settings and clinically tested efficacy. Looking ahead, I believe smart toothbrushes integrated with AI and app connectivity will become standard, offering personalized feedback and reminders to enhance compliance. Regularly updating your toolkit ensures you stay proactive about your oral health. So, challenge yourself today: try using your sonic toothbrush with a pressure sensor or switch to a Waterpik if you haven’t already. These small upgrades can yield significant benefits over time. Curious about how these tools fit into comprehensive family dentistry strategies? Visit our family dentistry secrets page for expert insights and personalized recommendations. Remember, consistent maintenance respects your investment in a healthy, beautiful smile, and the right tools are your best allies on that journey.
Lessons Learned from Real Dental Battles
One of the most eye-opening lessons I learned is that patience truly is a virtue when dealing with stubborn floss. Rushing to yank it out only increased the risk of gum injury—something I experienced firsthand early in my practice. Now, I understand that a gentle, controlled approach not only saves your gums but also maintains your confidence in managing dental mishaps at home.
Another insight is that the right tools make all the difference. Using fine-tipped tweezers and a good mirror isn’t just convenience—it’s a safeguard against unnecessary trauma. Regularly reminding my patients of this simple tip has dramatically reduced emergency visits for minor flossing issues.
Lastly, I discovered that water flossers are underrated heroes in this situation. They provide a gentle yet effective stream of water that can dislodge even the most stubborn floss pieces without risking damage to delicate tissues or restorations. Investing in the proper tools and knowing how to use them transforms a frustrating moment into a minor hurdle.
My Go-To Resources for Oral Care Confidence
I swear by the American Dental Association’s guidelines—they are the gold standard for safe dental practices and keep me updated on the latest research. For practical at-home tips, Family Dentist Pro’s expert advice offers real-world techniques that I trust; they emphasize gentle flossing and proper tool use. When exploring new technology, I rely on reviews from trusted brands like Waterpik and Sonicare, which have consistently delivered quality and reliability. These tools aren’t just recommended—they’re essential for anyone serious about their oral health.
Ignite Your Smile: Take Action Today
Remember, your smile is your best accessory, and mastering simple techniques like safely removing snagged floss is a step toward lifelong oral health. Don’t let a stuck piece ruin your day—equip yourself with knowledge and the right tools, and face these minor challenges with confidence. Many of my patients have reported feeling more empowered in their dental routines after learning these tips; now it’s your turn.
Have you ever struggled with removing floss or other dental debris safely at home? Share your experiences below and let’s learn from each other!