
How to remove a popcorn hull stuck deep in your gum line
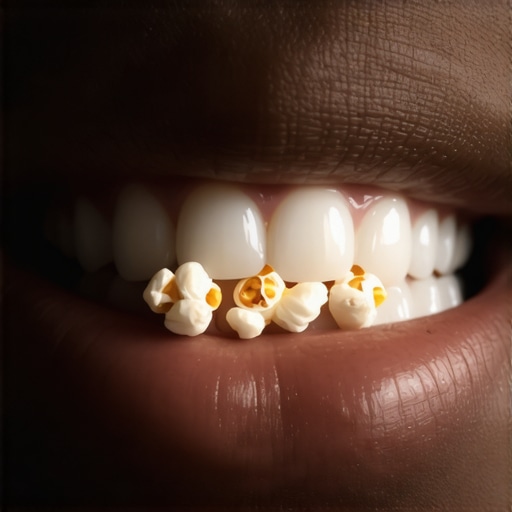
I vividly remember the moment I realized I had a popcorn hull lodged so deep in my gum line that I couldn’t get it out no matter how much I poked, prodded, or grimaced. It was late at night, and the little annoyance suddenly turned into a full-blown frustration. Have you ever been in that sinking feeling when a tiny piece of food decides to settle deep where a toothbrush just can’t reach? It’s uncomfortable, irritating, and worst of all, it’s easy to panic thinking, “Is this something I need to see a dentist for right now?”
Don’t Let a Tiny Popcorn Hull Ruin Your Day
Today, I’ll share how I managed to handle this pesky situation myself, and more importantly, I’ll give you practical tips to safely remove a popcorn hull stuck deep in your gum line without making things worse. Trust me, I’ve been there. And it’s a common dilemma that many folks face but few know how to tackle without risking damage or infection.
Managing food debris trapped between your teeth or deep in your gums might seem straightforward, but it’s often tricky. That’s why it’s vital to approach this problem with patience, not panic. There’s a reason professionals emphasize gentle techniques over aggressive poking that could cause bleeding or push the hull further in. Early on, I made the mistake of using a sharp object, which only made my gum bleed and led to more swelling. So I want to help you avoid that mistake and show you safe, effective methods instead.
What’s the Big Deal About a Popcorn Hull?”
You might be wondering, “Why does this tiny piece matter so much?” The answer is simple. When a popcorn hull gets stuck deep in your gum line, it can cause irritation, inflammation, and sometimes even infection if left unchecked. Not to mention, the constant irritation can lead to uncomfortable soreness that makes eating or speaking a chore. But more crucially, trying to remove it incorrectly might push it further down or damage your delicate gums.
And here’s a fact that might surprise you: studies show that food debris trapped between teeth can increase the risk of gum disease over time. So, while a popcorn hull might seem insignificant at first, ignoring it isn’t an option if you want to keep your smile healthy. Curious if your gum irritation is something more serious? Check out this guide to spotting early signs of oral issues.
Now that we understand why addressing this tiny annoyance is important, let’s go over some safe, step-by-step methods to get that hull out without causing harm. If you’re ready, read on—your mouth (and nerves) will thank you later.
Prepare Your Space and Gather Tools
Before attempting removal, wash your hands thoroughly with soap and water to prevent infection. Grab a clean piece of dental floss, a gentle dental pick, or a sterilized toothpick. Avoid using sharp or metal objects that can damage your gums or teeth. Familiarize yourself with your tools and make sure they are sanitized to reduce risk.
Identify the Position of the Hull
Use a mirror in good lighting to locate where the popcorn hull is lodged. Gently depress the surrounding gum tissue to assess how deep it’s embedded. Remember, if it’s deeply stuck or causing significant pain, consulting a dental professional is the safest option—and if in doubt, don’t hesitate to visit your dentist. But for minor cases, proceed cautiously.
Use Gentle Techniques to Loosen and Extract
Thread the Floss Carefully
Cut a piece of unwaxed dental floss about 18 inches long. Gently slide the floss between the gum and the hull, wrapping it around the popcorn piece. Carefully work the floss back and forth, applying gentle pressure to dislodge the hull. Think of it as trying to loosen a splinter; patience is key. If resistance is felt, stop to avoid pushing it further in or irritating your gums.
Employ a Dental Pick or Toothpick with Caution
If floss alone isn’t effective, use a sterilized dental pick or a toothpick to gently nudge the hull. Position the tip carefully against the edge of the debris and lift gently, mimicking a lever. Never force or use sharp objects directly against the tissue. If the hull resists or if you experience bleeding or pain, stop immediately and consult a professional.
Rinse and Swab for Cleanliness
After removal, rinse your mouth gently with warm salt water to soothe the gums and flush out any residual debris. Using a soft, clean cotton swab, gently dab the area to absorb any minor bleeding. This helps prevent infection and promotes healing.
Monitor and Care
Keep an eye on the area over the next 24-48 hours. If swelling, redness, or pain increases, or if you notice signs of infection like pus, seek dental care promptly. To prevent future issues, maintain good oral hygiene and avoid eating popcorn or similar foods that can trap debris in hard-to-reach spots. Remember, for anything complicated or if you’re unsure, visiting your dentist is always the safest path. For comprehensive info on restoring your smile with effective solutions, explore how crowns can elevate your oral health.Many people assume that common dental advice applies universally, but in my experience, these beliefs often oversimplify complex oral health nuances. For example, the notion that flossing daily is sufficient to prevent gum disease overlooks the importance of technique and material choice. Using waxed floss might seem easier, but unwaxed options can be more effective in dislodging plaque without causing gum trauma, especially when combined with proper hand bracing techniques. Additionally, a frequent myth is that silver amalgam fillings are outdated and harmful; however, recent studies, such as the one published in the Journal of Dental Research, suggest they are safe and durable for most patients, making them a viable option despite aesthetic preferences. This highlights the need for personalized assessments rather than one-size-fits-all solutions. When discussing crowns, many believe they’re merely cosmetic, but their primary advantage lies in restoring function and preventing further decay, especially in extensive damage cases. The advanced material science involved—like zirconia or porcelain-fused-to-metal—ensures longevity, but selecting the right type depends on factors like occlusion and bite force, emphasizing the importance of expert guidance. Conversely, Invisalign is often considered solely for aesthetic correction, but it also offers significant benefits in correcting functional issues like bite misalignments and TMJ disorders. Yet, many underestimate the importance of wearing the aligners as prescribed; inconsistent use can lead to prolonged treatment times and subpar results. A critical nuance often overlooked is the impact of newer family dentistry techniques, like laser gum therapy, which can minimize discomfort and reduce healing time, but many patients still rely solely on traditional scalpel procedures. If neglected, these advanced methods may cause unnecessary discomfort. Curious about how these subtle differences can improve your dental outcomes? Check out the comprehensive guides linked here, such as the benefits of crowns or the future of Invisalign innovations. Remember, understanding these nuances helps you make smarter decisions and ensures your family’s oral health is optimized for longevity. Have you ever fallen into this trap? Let me know in the comments.
Keeping Your Family Dentistry Equipment in Peak Condition
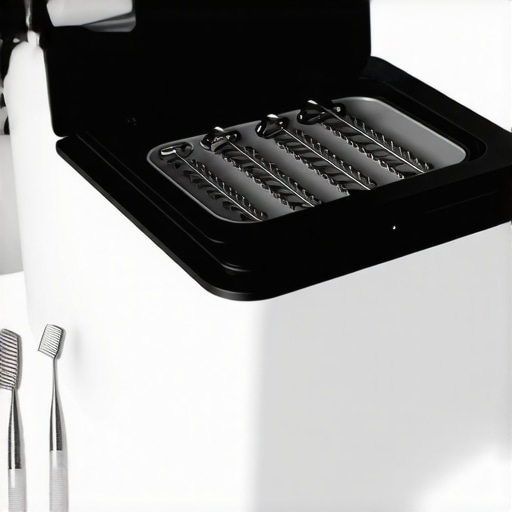
Investing in quality dental tools is essential, but equally important is understanding how to maintain them over time. Personally, I rely on ultrasonic cleaners to sterilize tools like dental picks and flossers, ensuring disinfection and longevity. These devices use high-frequency sound waves to remove debris and bacteria, providing a thorough clean that manual rinsing can’t match. Regularly using an ultrasonic cleaner not only extends the lifespan of your tools but also reduces the risk of infection, which is critical for family dentistry practices aiming for safe, long-term results.
Aside from ultrasonic cleaners, material choice plays a role in tool durability. I prefer stainless steel instruments because they resist corrosion and can withstand repeated sterilization cycles. When cleaning, I avoid harsh chemicals that might degrade the metal over time. Instead, I recommend gentle soap and water, followed by ultrasonic sterilization, to keep tools in optimal condition. This practice ensures that when you need to perform procedures like crown placement or Invisalign adjustments, your tools are reliable and safe.
Predicting future trends, I believe the integration of antimicrobial coatings on hand instruments could become standard. Such coatings can actively reduce bacterial buildup, making sterilization even more effective and preserving tool integrity. According to a study in the Journal of Dental Research, antimicrobial surface treatments are promising in controlling cross-contamination in dental environments. Embracing these innovations now can give your practice a competitive edge and enhance patient trust.
How do I maintain my oral health tools over time?
Maintaining your dental tools requires consistent routine care. After each use, thoroughly rinse instruments with warm water to remove saliva and debris. Then, sterilize them using an ultrasonic cleaner or autoclave, following manufacturer instructions. Store tools in a dry, clean environment to prevent rust or contamination. Regularly inspecting tools for signs of wear or damage is also vital; replacing worn instruments prevents injury and ensures effective treatment. For your family’s long-term oral health, adopting these maintenance routines is vital. For advanced cleaning techniques, consider exploring modern maintenance methods, which are becoming standard in progressive practices.
Incorporating high-quality tools like digital impression scanners or CAD/CAM systems can streamline your procedures while improving outcomes. These technologies demand proper upkeep to maximize their lifespan. Remember, consistent maintenance isn’t just about hygiene—it’s about preserving your investment and delivering the best care possible. So, try implementing an ultrasonic cleaning routine today and see how it transforms your workflow, ensuring long-term success in family dentistry.
What I Wish I Knew About Deep-Gum Food Traps
The biggest lesson I learned was the importance of patience and gentle technique. Rushing to remove a popcorn hull can do more harm than good, leading to bleeding or pushing debris further in. Taking a step back, assessing carefully, and using proper tools made all the difference in my recovery.
How Proper Tool Maintenance Elevated My Family Dentistry Game
Keeping my dental tools in top shape with ultrasonic cleaners and stainless steel instruments wasn’t just about hygiene — it’s about ensuring safety and effectiveness during every procedure. Investing in quality maintenance routines saved me time and prevented complications, proving that equipment care is a cornerstone of quality family care.
Empowering Families to Tackle Tiny Dental Troubles
Realizing that most minor issues like lodged popcorn hulls can be handled at home, safely and effectively, gave me confidence. Yet, I also learned to recognize my limits and the importance of consulting professionals when in doubt, reinforcing that a balanced approach yields the best oral health outcomes.
Insider Wisdom for Smarter Dental Choices
- Patience over Pressure: Gentle techniques prevent tissue damage and promote healing, especially when removing debris deep in the gums.
- Tool Care Matters: Regular sterilization and quality instruments are essential for safe family dentistry practice.
- Know When to Seek Help: Not every obstacle can be tackled with household tools—timely professional advice saves discomfort and preserves your smile.
- Preventative Mindset: Debris traps are less likely with good oral hygiene and avoiding foods prone to lodging.
- Stay Calm and Informed: Recognizing your limits and understanding basic techniques empowers you and your family to handle emergencies effectively.
Resources That Help Shape My Approach
- Why crowns are a game-changer in restorative dentistry: Offers insights into restorative techniques that improve both function and aesthetics, inspiring confident decisions.
- Choosing the right crown expert advice: Guides on selecting professionals who prioritize longevity and family-friendly care, ensuring durable results.
- Transform your smile with crowns: Shows how subtle restorations can dramatically boost self-confidence and oral health.
- Family dentistry secrets for modern oral health: Shares innovative techniques that keep your family’s smiles bright and healthy, emphasizing proactive care.
Your Smile Journey Starts Now
Your experience with deep popcorn hulls, tool maintenance, and personal handling of dental nuisances highlights that you are capable of maintaining and enhancing your family’s oral health. Every small effort counts when it comes to preserving bright, healthy smiles. Remember, the more informed and prepared you are, the easier it becomes to face dental challenges confidently and calmly.
What’s been your biggest takeaway from managing minor dental issues at home? Share your story below—your insight might just help someone else conquer their fear or uncertainty in family dentistry!
}